Let's go
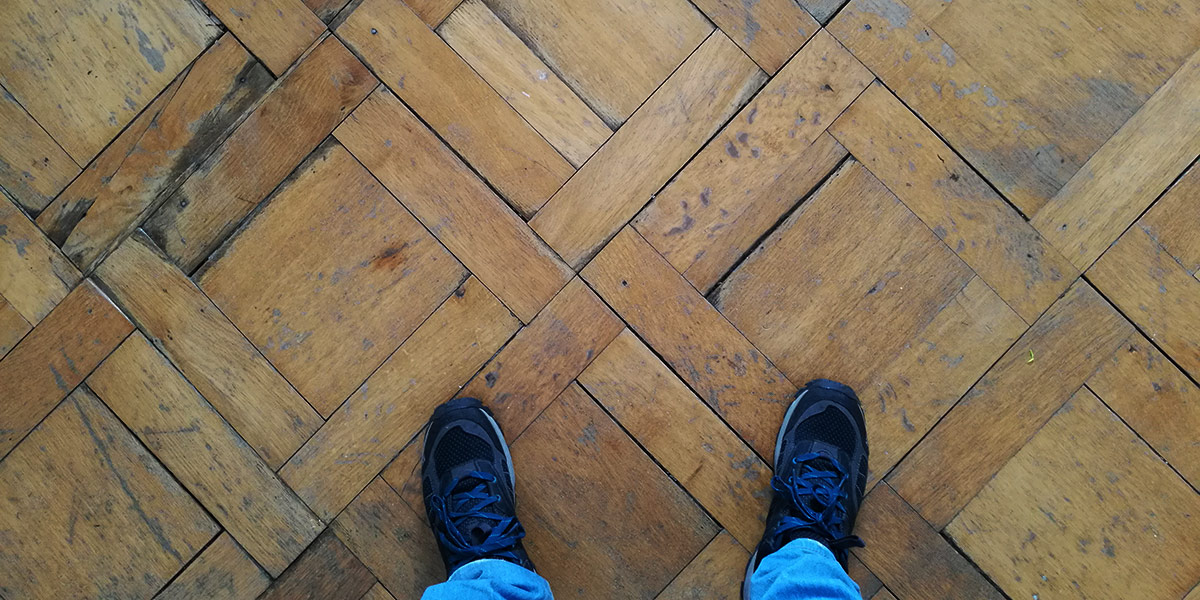
It is old, it creaks, it is uneven, it is dirty and above all: it is beautiful. Every day I walk several times over our parquet floor in the living room/studio. And every time this old man moans about my weight, I wish once more that I could somehow preserve this treasure. Wouldn't it be wonderful to use this floor as a seamless texture in 3D? Best is high resolution in patternpanda quality and above all with an image section large enough that the texture can also be used for larger areas without having to be repeated several times? If you agree, read on: I proudly present my latest project: HRFS – High Resolution Floor Scanning.

Problems
Problem #1: My feet.
When I shoot vertically down, my feet are inevitably in the picture. Although I am quite satisfied with my toes, they do disturb the texture.
Problem #2: The image section.
Even if I screw my 14mm wide angle to the camera, I don't get close to enough ground on the image to get a sufficiently large texture section, which can later also be used on large areas in the rendering without a repetition becoming clearly visible. (And in addition to my feet I also have my legs in the picture. Yeah.)
Problem #3: Colour and brightness differences.
Floors have an inherent habit of being installed inside buildings. However, the lighting conditions indoors are anything but homogeneous: Shadows, different colour temperatures of the light (partly a wild mix of artificial and natural light) make it difficult to create an image that does not look completely inhomogeneous.
Problem #4: Light conditions.
Indoors it is much darker than outdoors during the day. However, our texture should not impress by sensor noise, caused by ISO 16,000, but by unwashed edges and sharpness of detail.
Solutions?
The next part is work in progress and is to be understood rather as a loose collection of ideas and not as a tangible tutorial. Just join me on my bumpy, sometimes conceptless path and learn from my mistakes in this research journal.
Solution No. 1: Reach high! (Per aspera ad astra)
A large part of the problems can actually be broken down into one problem: I'm too small. This can be solved quite straight-forward by putting a folding ladder in the room and my ass on the ladder.
Unfortunately, these efforts are not necessarily spoiled by success: I still have to reach for very wide angle focal lengths (specifically: 24mm) to get a satisfying framing. Not only do I have to deal with the typical problems of wide-angle photography (distortion at the edges of the picture), but I also got the ladder's feet in the picture. After 20 minutes of fiddling around I gave up on this solution. (Especially since I'm not particularly keen to bring a ladder to the location every time anyway.)
Solution No. 2: Way to go!
From my work on spherical panoramas (see HDRI) I am quite familiar with combining several shots to a high-resolution collage (especially the associated problems...) Nevertheless, this seems to me to be a feasible way at the moment:
Since in principle any number of individual images can be calculated, it is possible to work with longer focal lengths. As a result, my feet are no longer in the way and the general image quality is much better, i.e. lower distortion, better rendering of resolution (e.g. the Nikkor 14-24 f/2.8 ideally achieves a resolution of 17 P-Mpix in sharpness, while the Sigma Art 35 f/1.4 offers 30 P-Mpix). This bonus is especially welcome for textures that are often viewed very closely.
All right, let's do this:
For this experiment we need:
A camera:
Since we are now taking several pictures, the sensor resolution of the body is no longer important. Anything with more than 10 megapixels will suffice in principle. I'm using the D800. Not because I would need its resolution of 36 megapixels, but because it is simply my favourite working device.
A tripod:
Even if the German guy in me wants to scream now that one should not compromise on quality: It is largely irrelevant which tripod is used. The most important thing is that it must be possible to align the camera so that it can point 90° downwards. (Which excludes many cheap goods. So the little German may also rejoice a little bit.) For my experiments I use the Manfrotto
A lens with a suitable focal length:
the shorter (= wide angle), the more likely it is that the tripod legs get in the way. The longer (=tele), the more individual images are necessary. At the moment I ride very well with 35mm, but I will also try my 60mm macro.
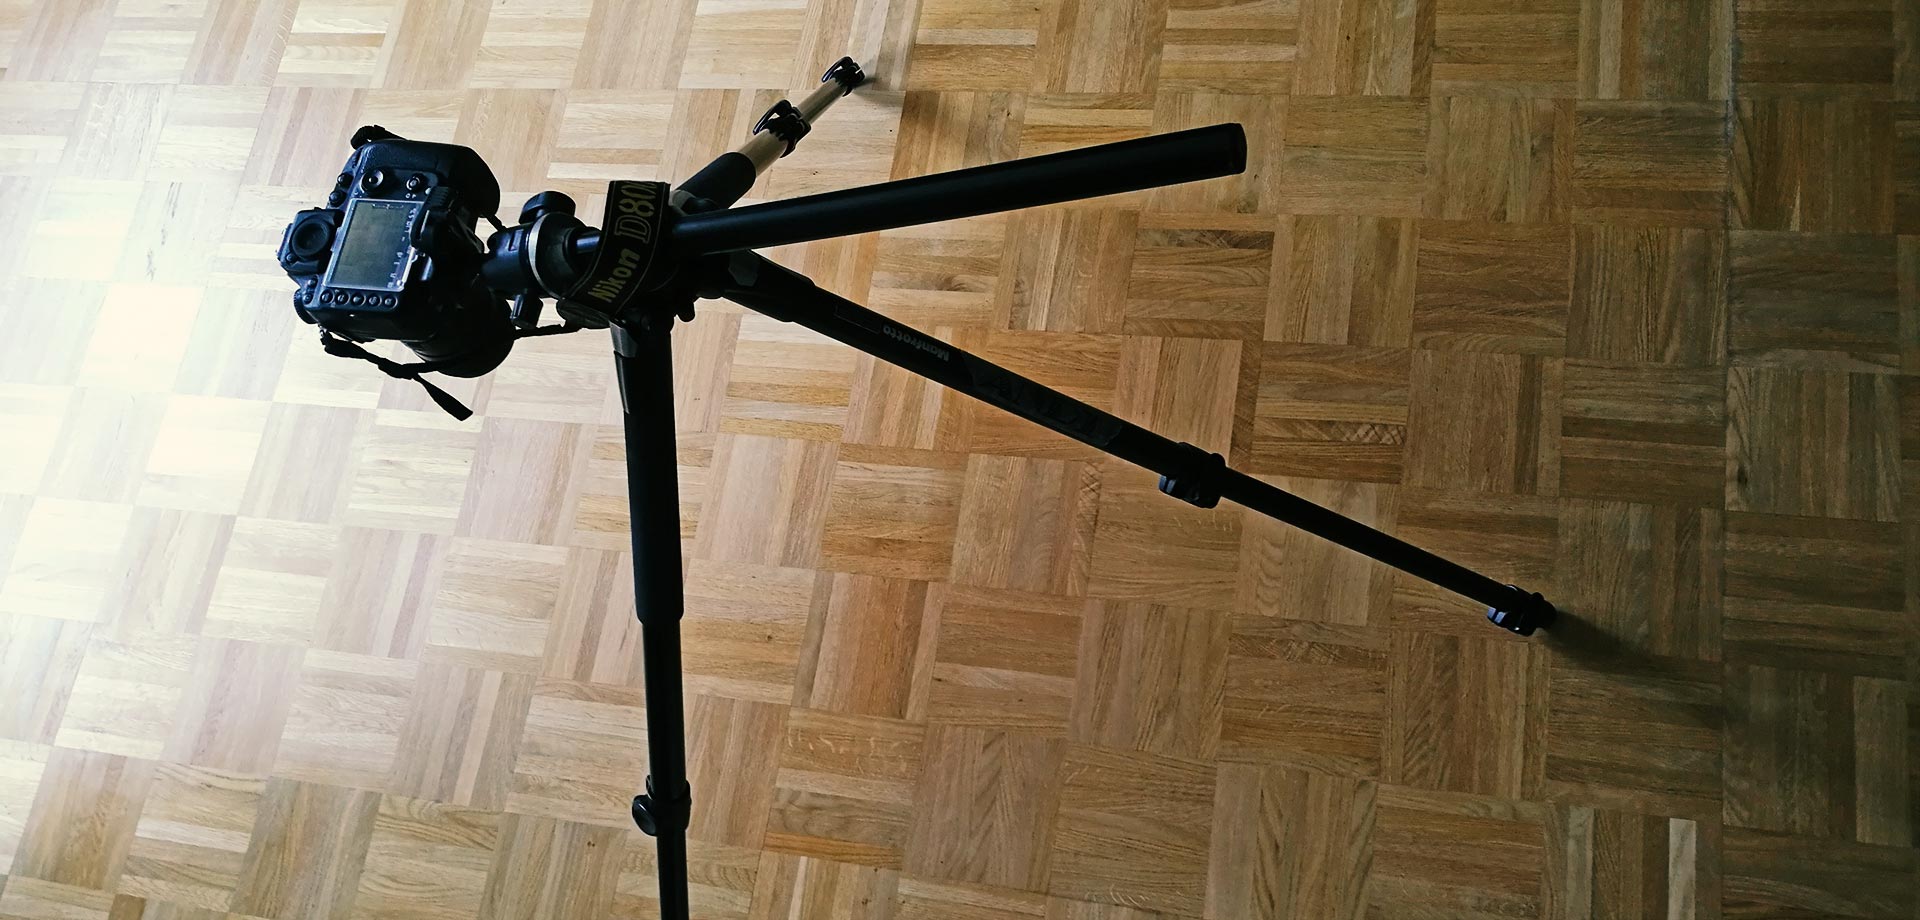
The image above shows my setup (version 1) with a different floor and location.
The tripod fulfils several reasons: Firstly, we can work with the camera's lowest ISO setting (which firstly leads to significantly lower image noise and secondly to a better dynamic range: Highlights won't bloom out as quick as before and depths can be better reconstructed. Secondly, it is possible to align the camera exactly vertically downwards (unfortunately the internal inclinometer of the D800 cannot handle this setup, so I aligned the body with a spirit level.
Probably I used a sledgehammer for cracking nut, since it is certainly enough to point the camera downwards by plain eyesight. And third: In order to stitch the images later, very structured work is necessary: each image requires about 15-25% overlap with the previous image. Both horizontally and vertically. In order to ensure that I don't mess up this work I use the Nikon's Live-View-mode and move the whole tripod-camera-setup as straight as possible.
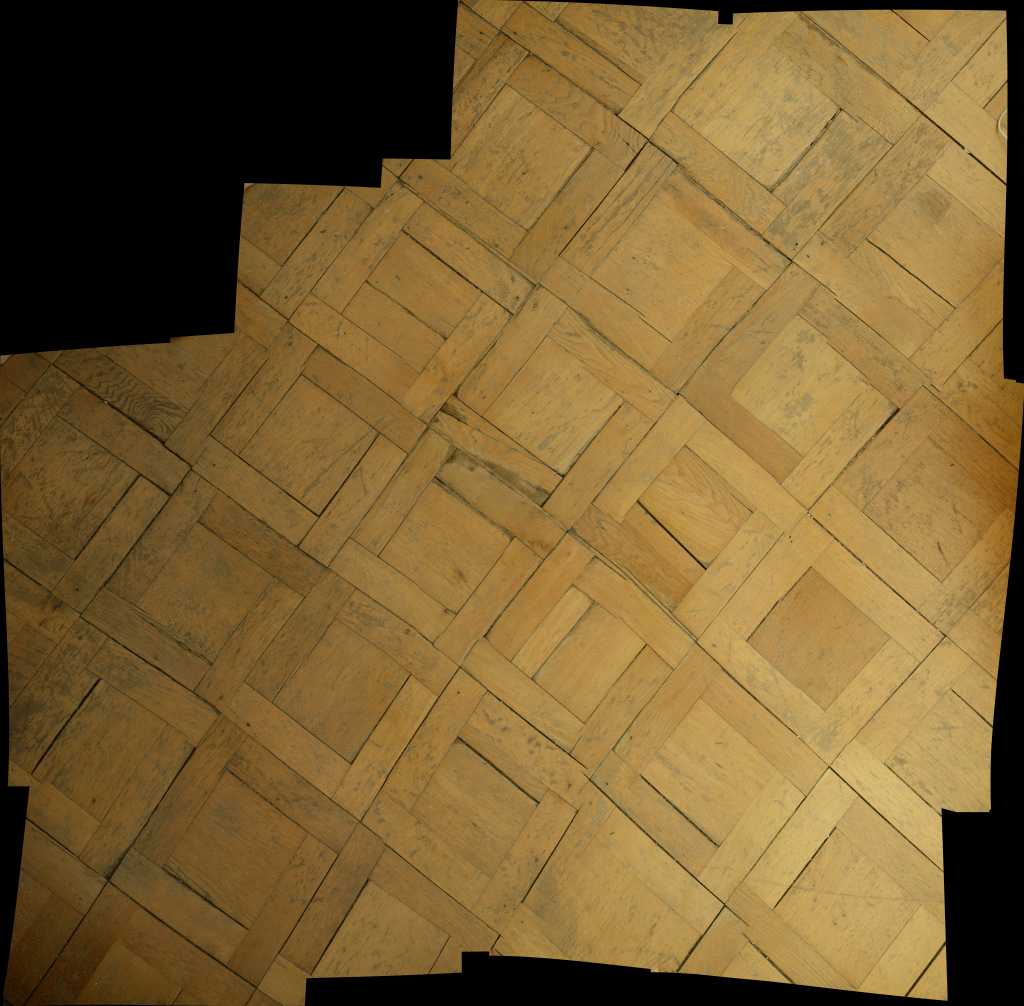
Stiching the images
When shooting I try to get an overlap of at least 20% between each neigbour image in order to ensure that the software finds enough matching points to align the images to one big collage wothout any missing spots or distortions.
I experimented with two software solutions for stiching: Color Autopano Giga and Photoshop CC. Although Autopano is one of the best software solutions out there for panoramic images (and should therefore excel in every way since stiching is the bread-and-butter in a lot of panorama projects) I got the best output by using Photoshop's plain "Photomerge" function set to "Auto".
Extracting the maps
I did some preparation to ensure that the map will be seamless and tileable as well as smoothed out some contrast and color variations in order to equalize the overall look and feel. Basically I followed the amazing good tutorial from Jeremy Birn here.
To extract the normal-, gloss-, ambient occlusion- and displacement-maps I did experiments with two softwares: ShaderMap and PixPlant.
The image above is a screen capture from ShaderMap. Although I like the displacement and diffuse output I am not quite satisfied with the rendering of the gloss map. I tweaked a lot but I was not able to find a version that is either realistic or aesthtically satisfactory.
At last I stuck with my personal bread-and-butter software that keeps running almost always on my workstation: PixPlant. Since I already ensured that the texture is seamless and colorwise equalized I skipped the texture-synth-process and directly extracted the maps from the image.
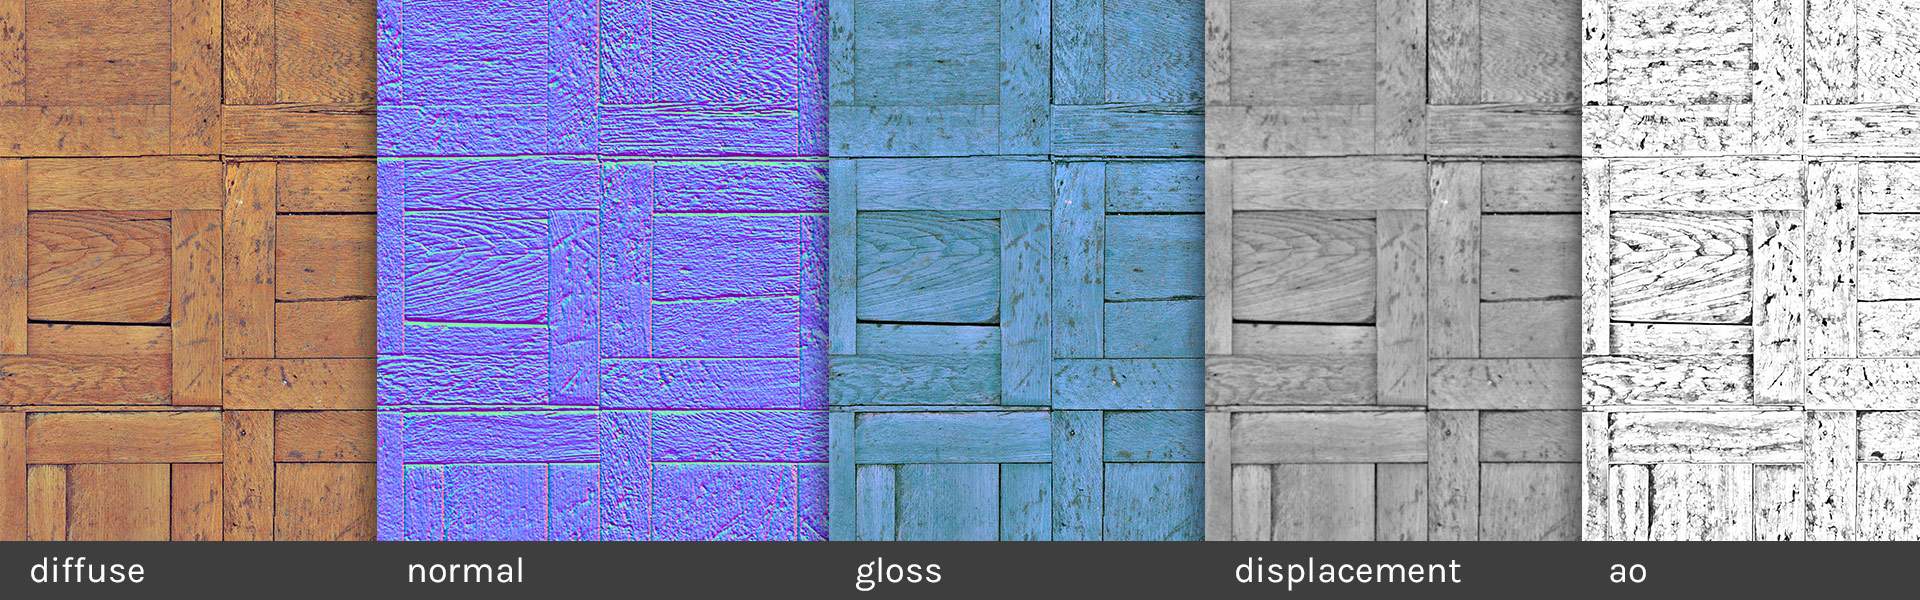
The image above is the output of PixPlant. Granted, the gloss map also is not the best, but it can be tweaked easily in Cinema4D by increasing the exposure value.
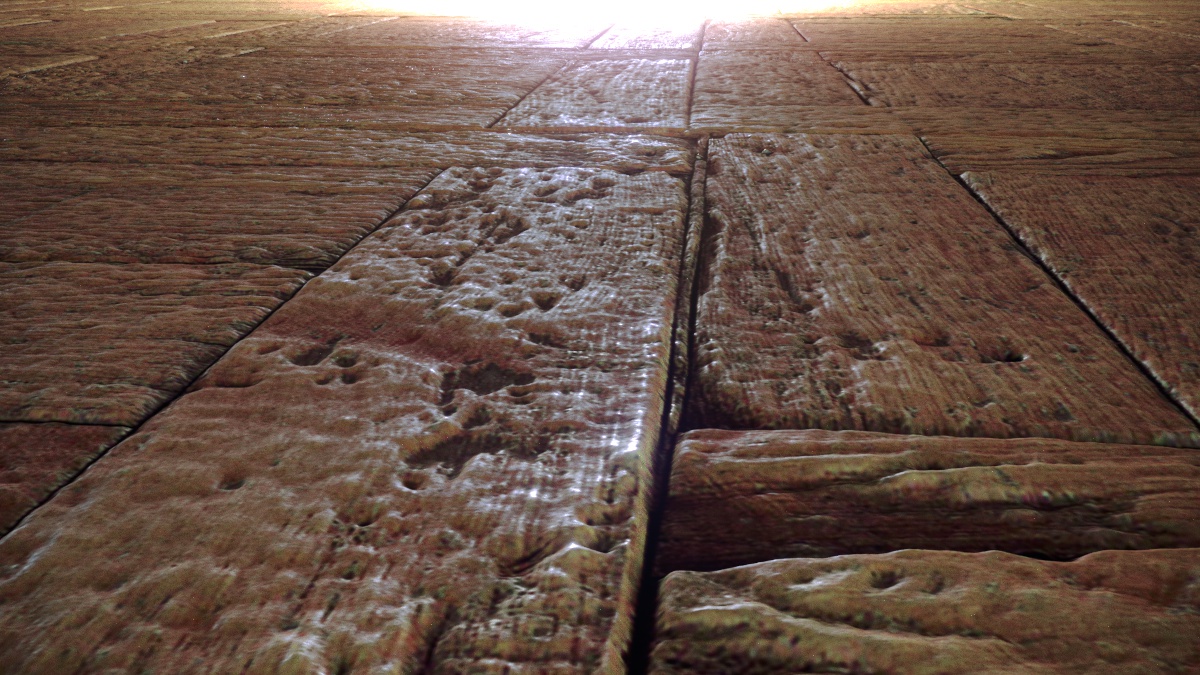
Displacement & Resolution
One of the biggest advantages of the high resolution is that the material can be handled very variably in rendering: Close-ups are just as possible as deployment in wide environments.
Displacement is also very effective. In this rendering only the diffuse, reflection and displacement channel was used and the result is already very satisfactory.
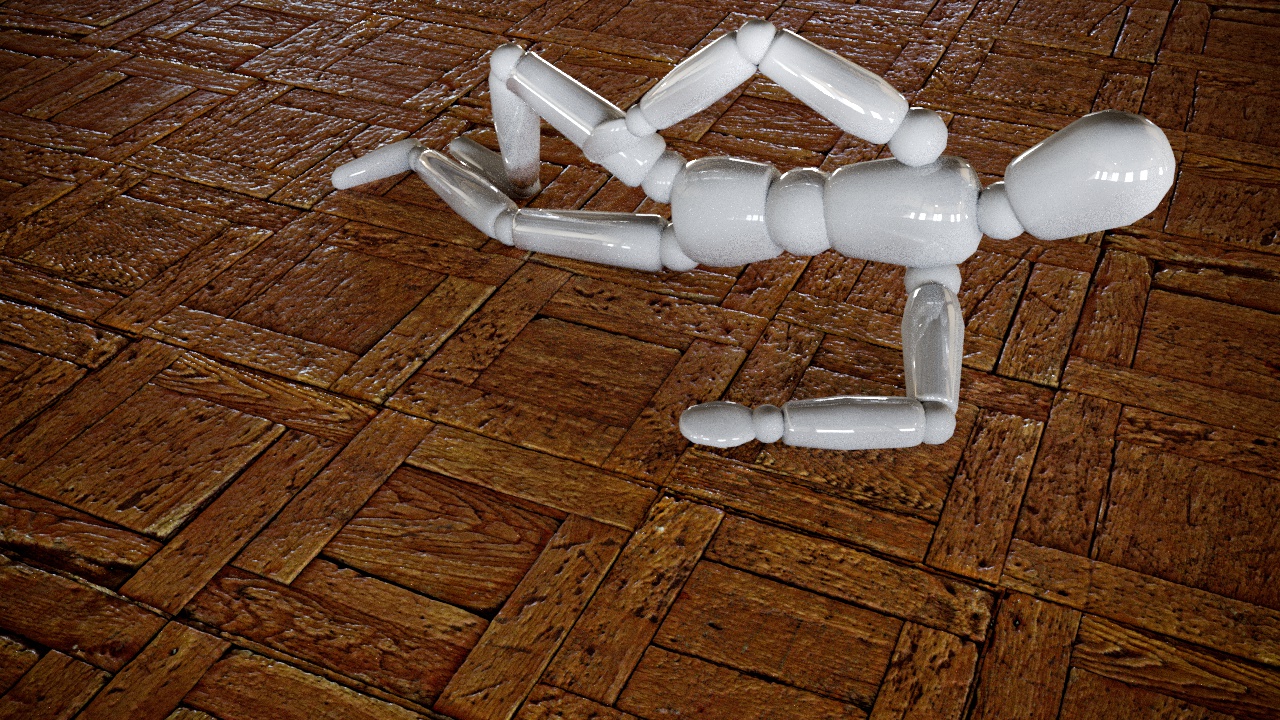
Also the tweaking of the gloss map is quite flexible. If you want to render a wet floor (though it is not very realistic with this kind of wood surface) it is also possible.
Download
If you like this work, you can download the texture as well as the maps in the Texture Library (section "wood"). Look for the Bolt Icon that indicates that the texture is part of the high resolution floorscan project.
Next Steps (work in progress)
Illumination
Even though the tripod permits exposure times of nearly any length, working with natural light on site is not always optimal and strongly dependent on the respective location. The partly different light colours (mixture of artificial and natural light) also leads to clear artefacts in the texture, which later have to be cleaned up with Photoshop (=not ideal).
In order to address this problem, a light source would be nice, which always provides constant light and illuminates the respective image section evenly. Ideally, it is bright enough to level the lighting conditions on site.
As one of the few professional grade Nikons, the D800 offers an internal flash that is permanently mounted. Unfortunately, the good piece has the bad habit of leaving a bold, disturbing reflection in the middle of most materials. Uniform illumination is therefore out of the question. What has been shown, however, is that the flash very successfully equalizes the light on location so there is a way to go.